
Knowledge Base

Firewall Plans allow you to control which ports, protocols, and IPs are allowed to communicate with your VPS. Using firewall rules adds an extra layer of security by blocking unwanted traffic directly from the control panel — before it even reaches your server.
Follow this step-by-step guide to create a Firewall Plan using the VPS Control Panel.
Important: Firewall Plans are currently available and supported for Linux VPS only. While the feature can technically be applied to Windows VPS, it may not reliably allow specific IP-based access. For Windows VPS users, we recommend managing detailed firewall rules inside the Windows operating system itself.
Log in to your client area at virteche.com.
Navigate to My Services → select your VPS → click Panel Login.
You will be redirected to cloud.virteche.com.
Log in using your virteche.com account email and password.
Once logged into the VPS Control Panel:
Click Firewall from the left-side menu.
You will see the Firewall Plan creation page.
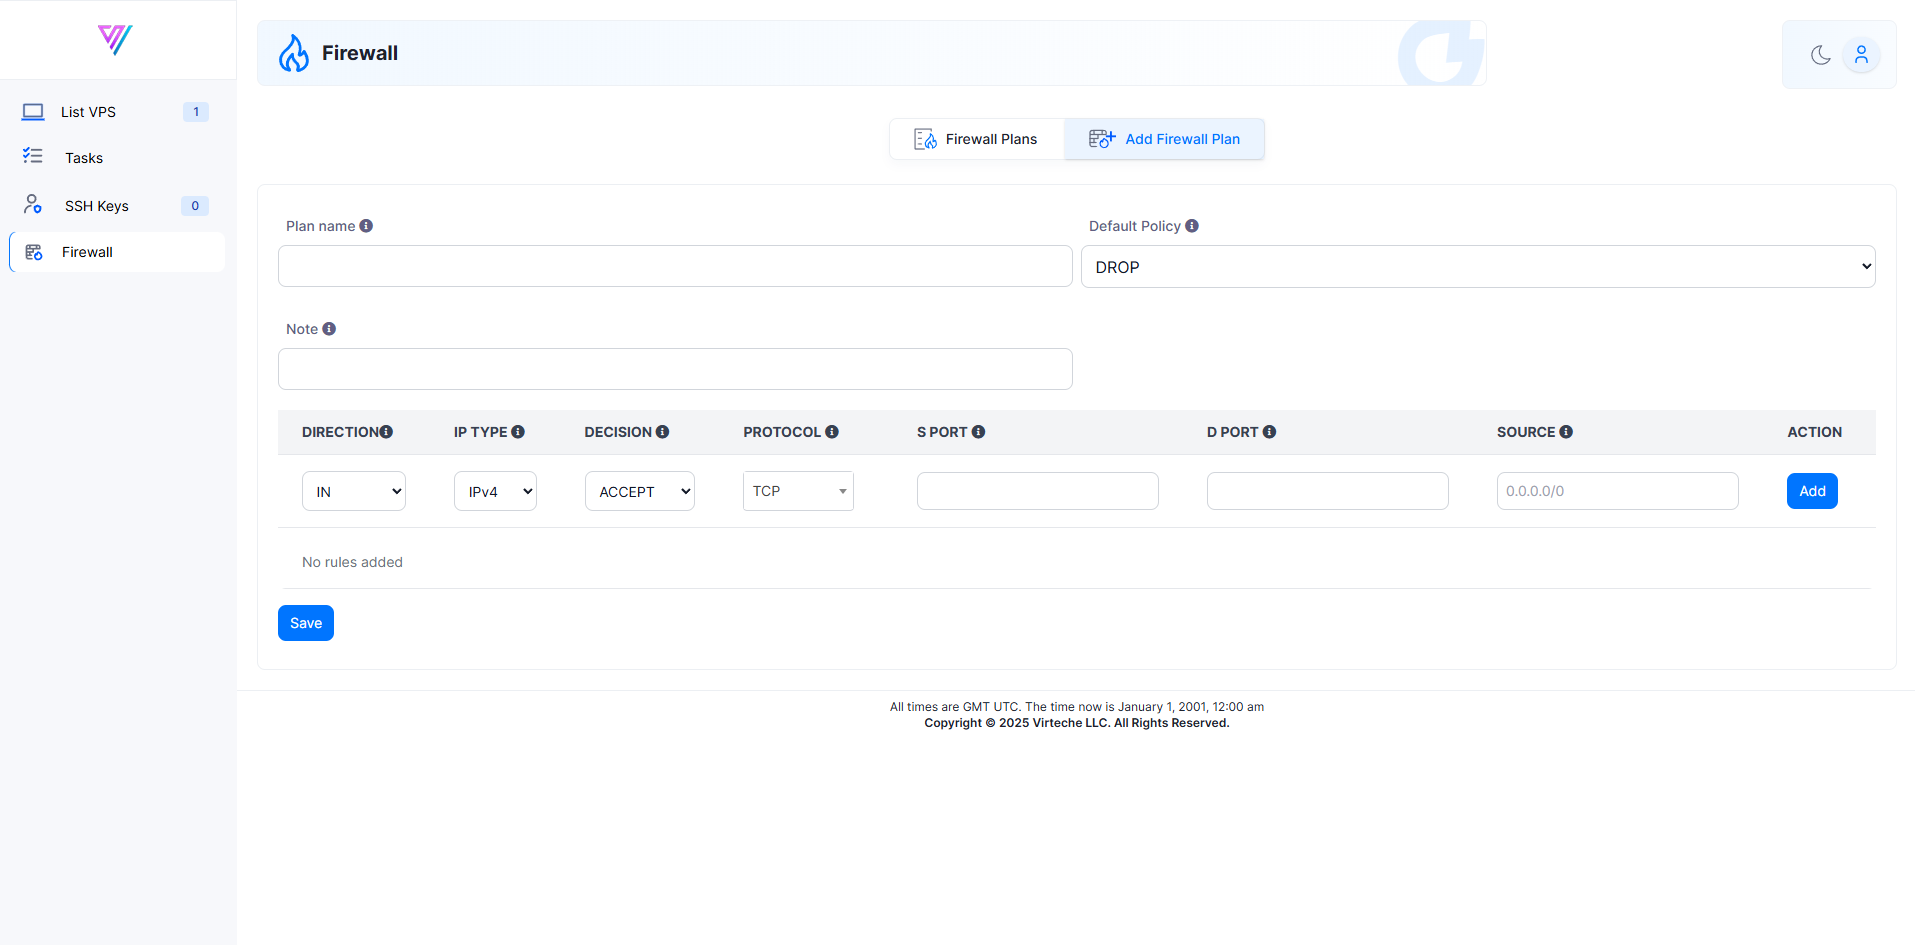
To create a firewall plan:
Plan Name: Enter a name for your plan.
Default Policy: Choose DROP to block all traffic unless specifically allowed.
Note: (Optional) Add a description for your own records.
You can add individual firewall rules to allow specific traffic.
Direction: IN (for incoming traffic).
IP Type: IPv4
Decision: ACCEPT (to allow traffic).
Protocol: Select TCP, UDP, or ALL.
S Port (Source Port): Set to 0 (any source port).
D Port (Destination Port): Specify the port you want to allow.
Source: Set 0.0.0.0/0 to allow traffic from all IP addresses, or a specific IP/subnet if needed.
After filling the rule fields, click Add.
Repeat for each service you want to allow.
Once your rules are added:
Click Save to apply the firewall plan to your VPS.
Your VPS will now only allow the traffic you specified, blocking everything else by default.
If you mistakenly block yourself, you can recover access using VNC via Panel Login.
Windows VPS users: For detailed IP restrictions or RDP port control, please configure Windows Defender Firewall directly inside your server. Firewall Plans on the panel may not fully support IP exceptions on Windows.
If you experience any issues setting up your firewall, or accidentally block yourself from accessing your server, please create a support ticket or email us at support@virteche.com.
We’re here to help you stay secure and connected.